
Creating a Code Ocean capsule synced to GitHub repo#
GitHub: Create a new repository using one of the templates#
Find the templates here: AllenSWDB/ SDK template: AllenSWDB/swdb2025_allensdk_environment PyNWB template: AllenSWDB/swdb2025_pynwb_environment
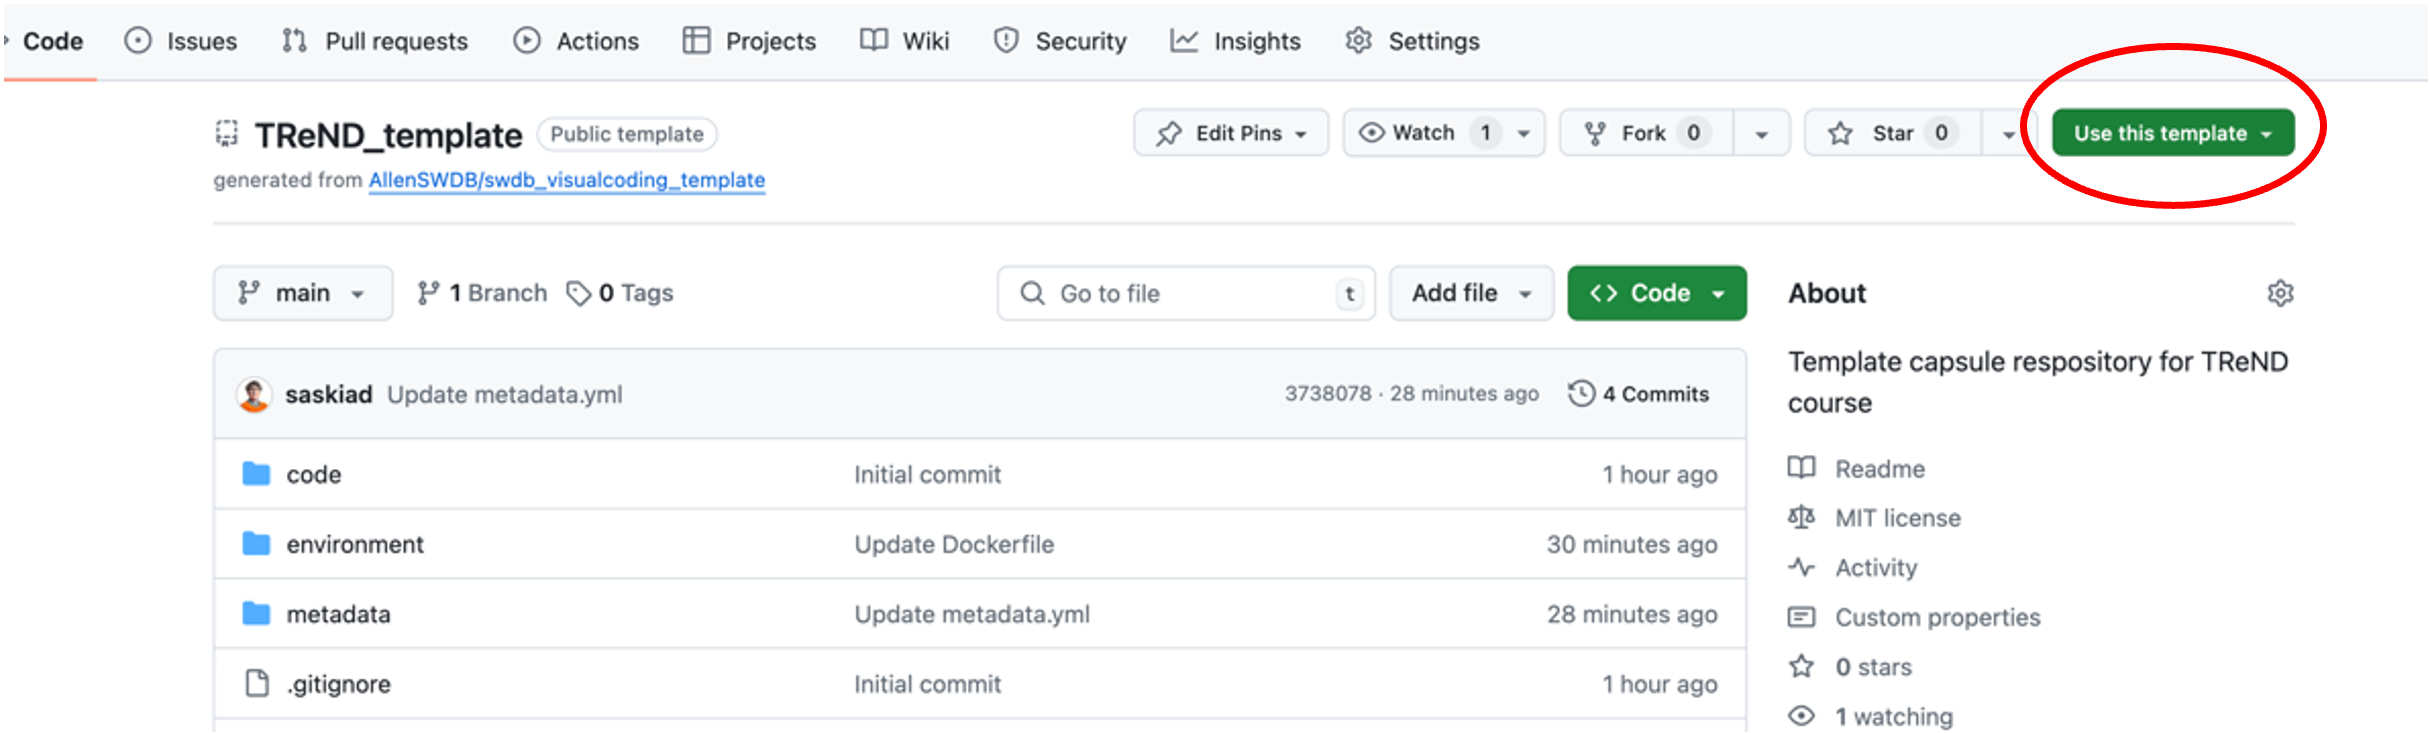
Use a template to make a new repository. Click the
Use this templatebutton in the top right corner:
Make yourself the owner of the new repository
Give the repository a name.
Select public or private
Click the
create repositorybutton. You have made a new repository!!
In order to sync between your GitHub account and your Code Ocean account, you need to add a token from GitHub to your Code Ocean account.
GitHub: Create a token:#
Navigate to your profile picture in the top right corner.
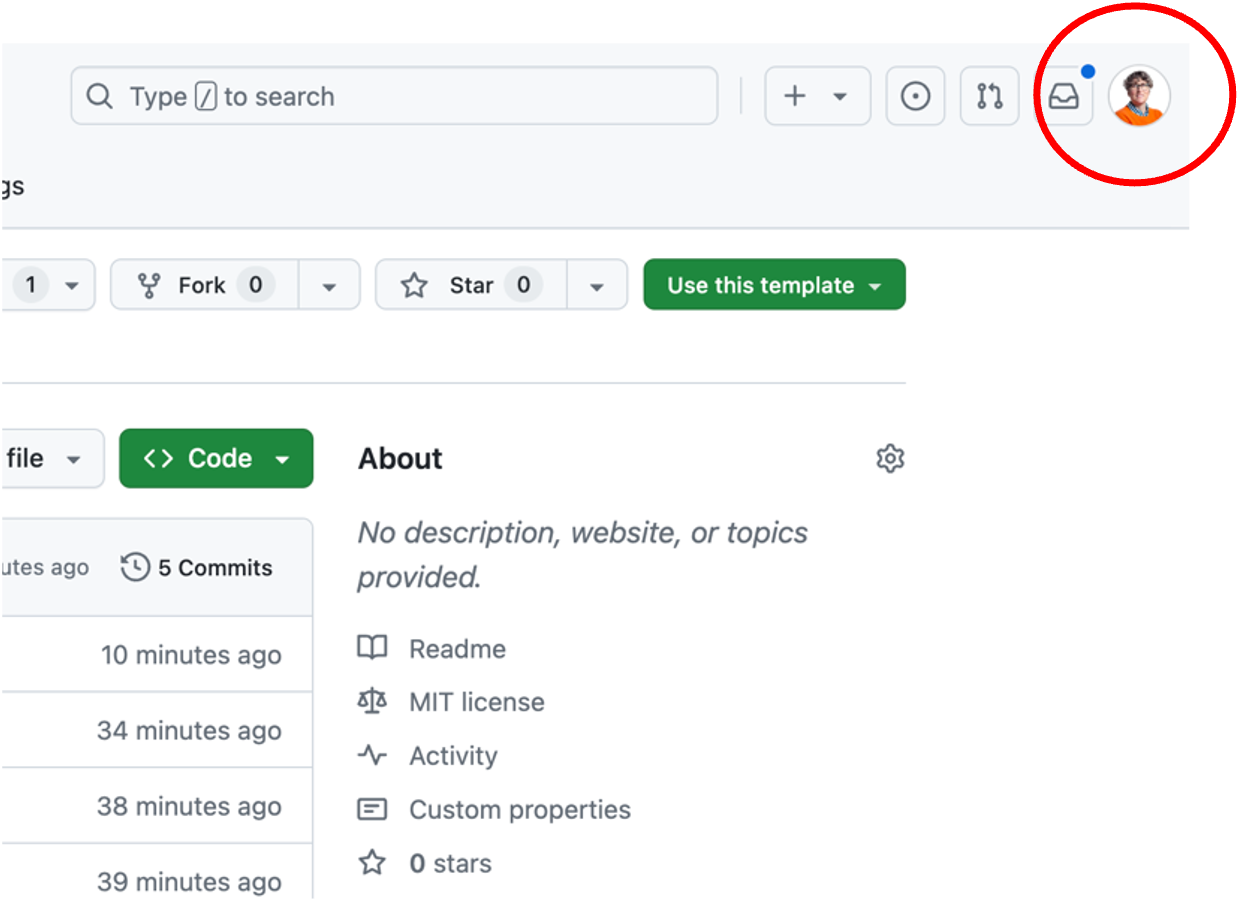
When you hover over this, a list of options will appear. Select
Settings

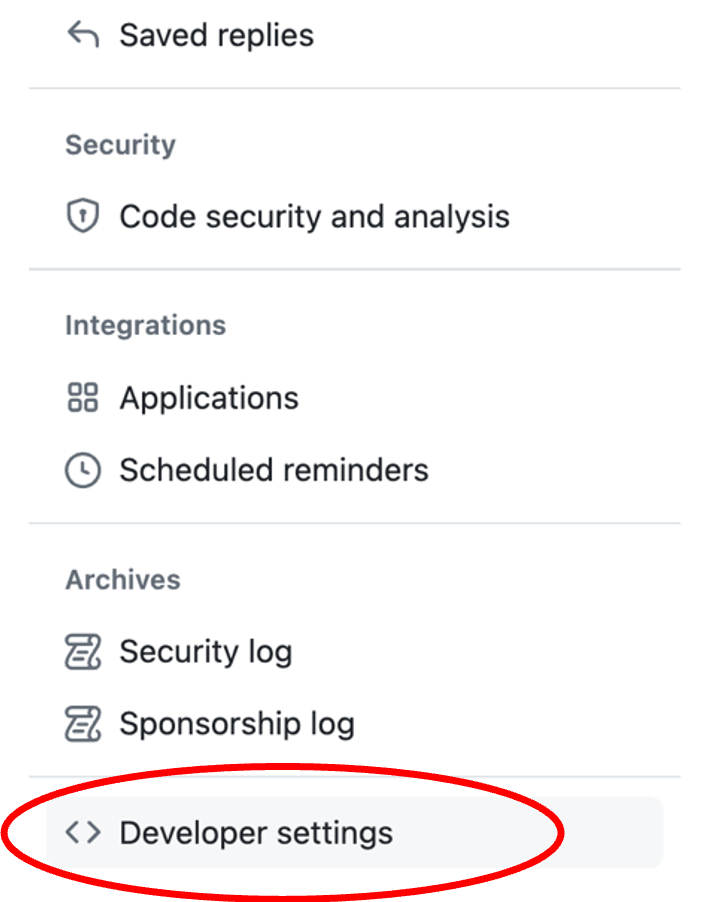
On the left-hand side, select the option for
Developer Settingsnear the bottom of the list.
On the left, select
Personal access tokensand then selectTokens (classic)from the dropdown that appears.

On the top right, click on
Generate new tokenand then selectGenerate new token (classic)from the drop down

Add a note for what the token is for and set the expiration (you can choose no expiration if you want), and select the box next to
repounder scopes

At the bottom of the page, select
Generate token

You now have a token - something that looks like this:

Copy this immediately! It is sometimes helpful to paste it into a text file to save as you won’t be able to access it again.
Add your GitHub token to your Code Ocean account#
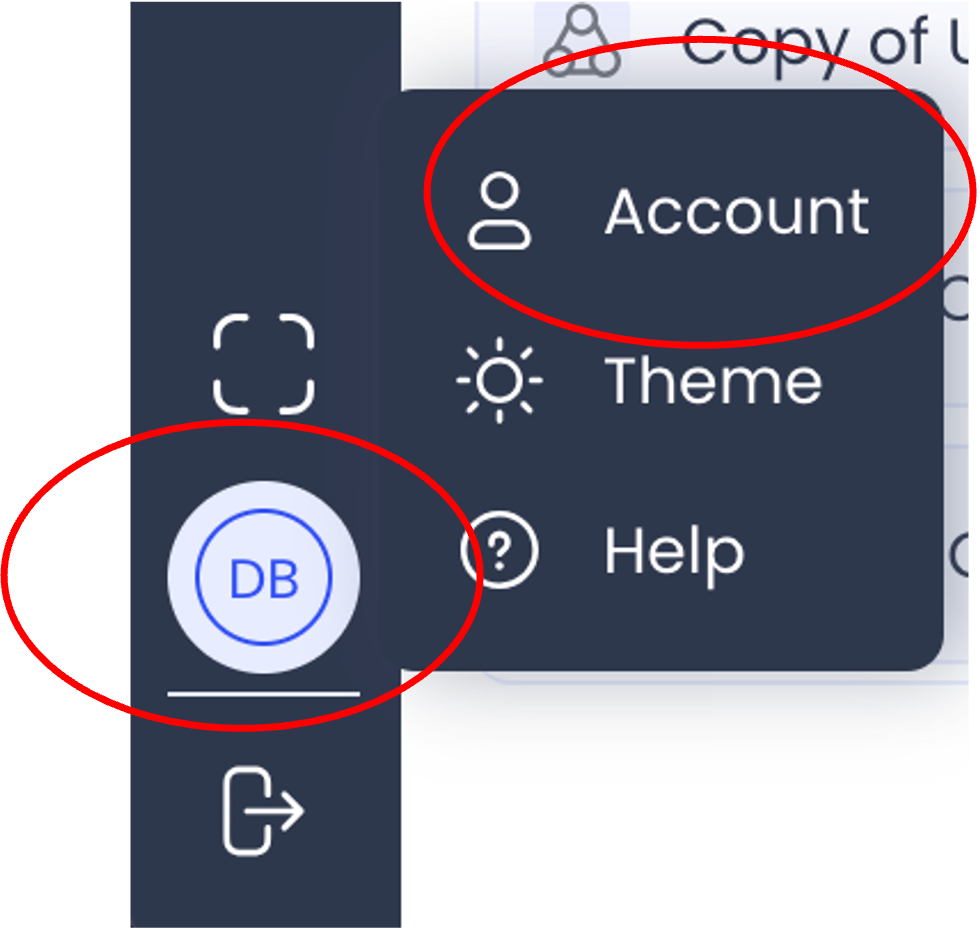
In Code Ocean, navigate to your account by clicking on the the icon with your initials on the bottom left. This gives you list of options. Choose
Account
On the top right, click on
Add Credentialsand selectGitHub Credentials

You will be prompted to enter your GitHub account name and the GitHub token that you copied above.
At this point, your GitHub and Code Ocean accounts are linked!
Code Ocean: Create a capsule from your GitHub repository#
Create a new capsule. Click on the plus icon on the left near the top to Create New. Select the
Clone from Gitoption under the “Capsule” header. It’s the one with the GitHub icon.

Paste the URL of your GitHub repository into the box.
You have made a capule!
Configuring your capsule#
Change the name of your capsule so that it’s clear what it is. Update the ReadMe as well
The environment is already set up according to the template. If you need to add more packages: Click on the
environmenttab on the left to add packages.

You might also need to increase the compute resources. This is also in the environment tab in the top right.

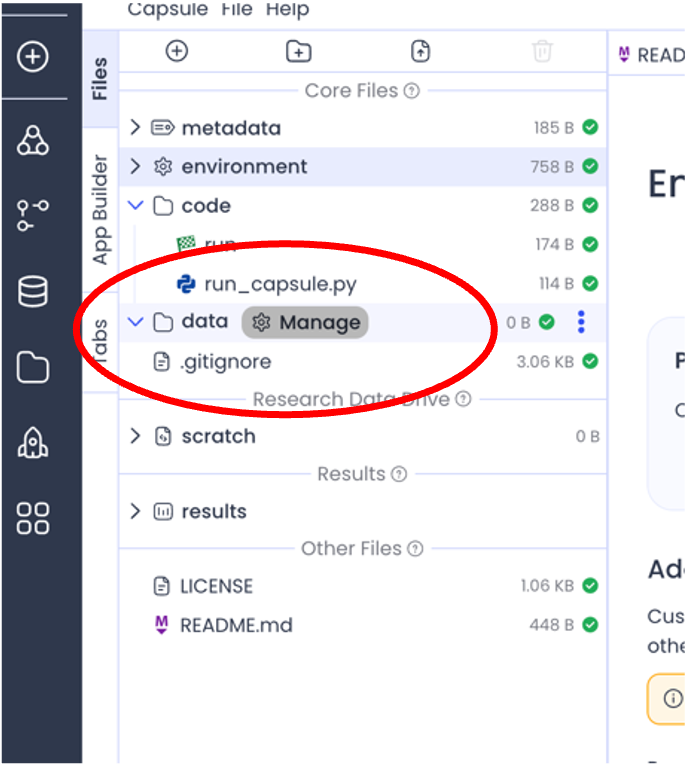
Attach data assets. Click on
Managenext to thedatatab on the left. Search for the data assets you need. (Look at the capsules we’ve used in the past week if you need help identifying the data you need). When you find the asset, click the+to the left of the asset name
Now you have a capsule with an environment set and data attached. It’s up to you to add the code! Click on the
JupyterLabicon on the right to launch Jupyter.

Once it has launched, navigate into the Code folder. To open a blank notebook, click on the
Python3option under Notebook in the Launcher.

Work in your notebook! Save your work!
To shut down the capsule when you, click the big red button on the top left. You can leave it on
Holdto preserve any packages you’ve installed within jupyterlab, or shut down fully if you need to add new packages to the environment.
Sync with GitHub#
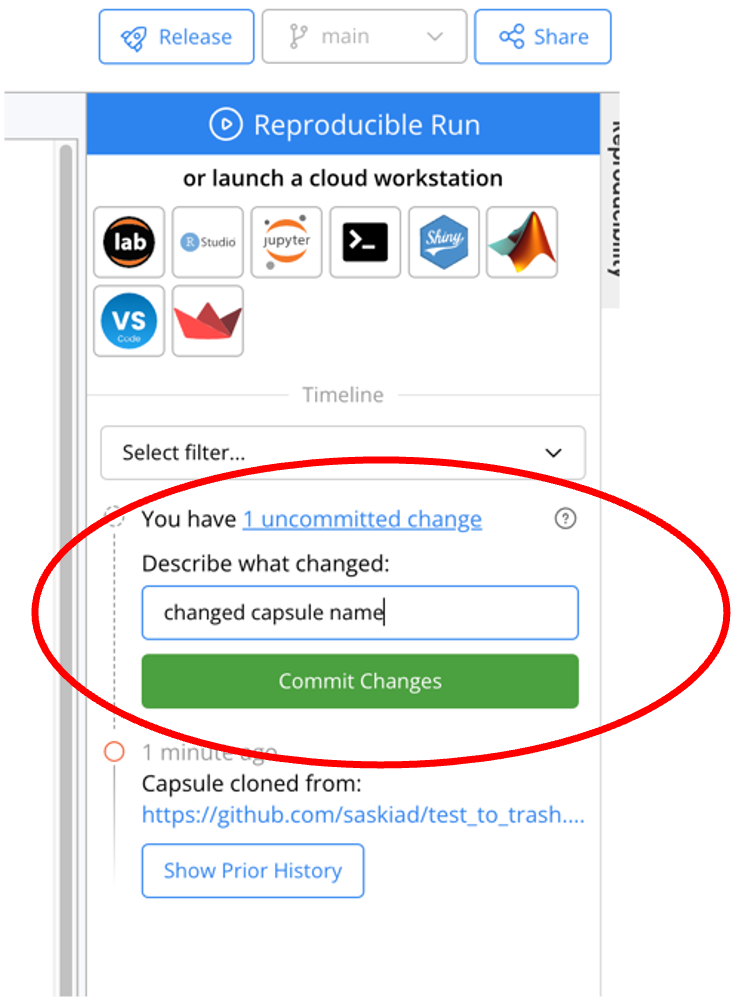
When you’ve made changes and have shut down the capsule, you can commit your code to your GitHub repository. You can follow the steps you’ve learned using the Terminal, or you can use the panel on the right. Include a brief description and click
Commit Changes
Push changes to GitHub using the
Sync with GitHubbutton on the panel on the right after your changes are committed. This button only appears when all changes are either committed or reverted.
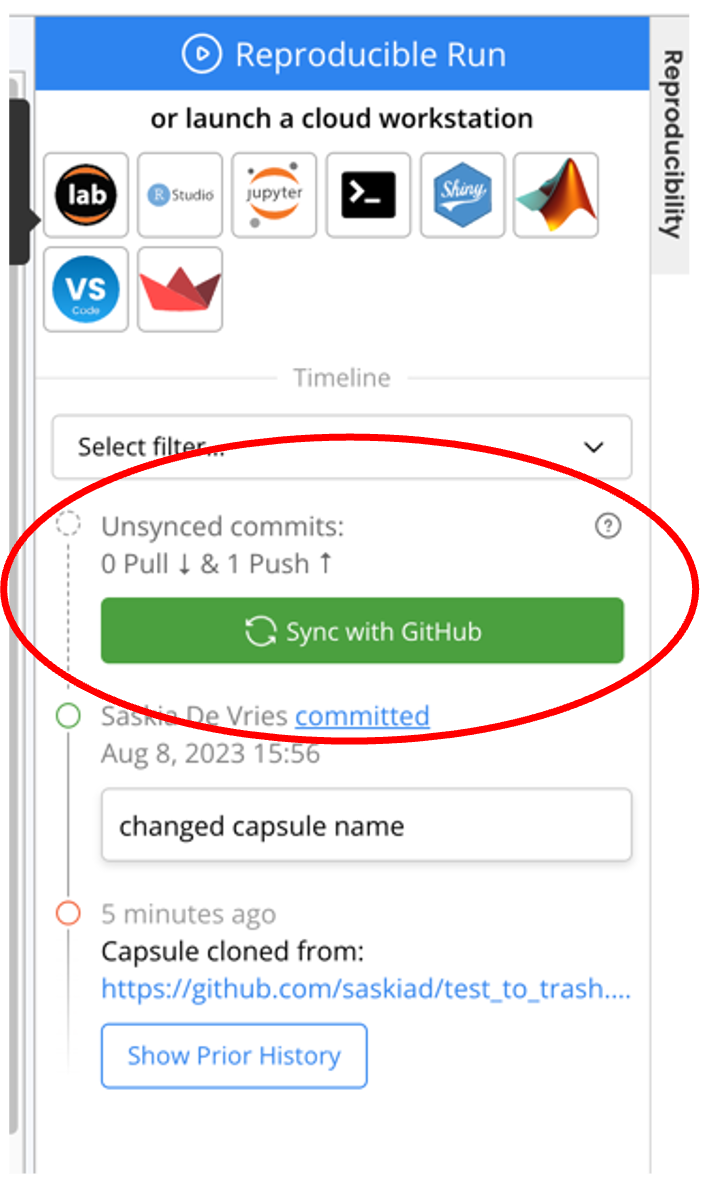
This sync button will also pull changes that have previously been merged into the GitHub repository.
This method of syncing with GitHub does not handle merge conflicts well, which is where using the Terminal will likely be preferred.